Manage, version and migrate your Planning Analytics database with confidence #
Git repository integration is an important step in managing Planning Analytics database objects, particularly when migrating to Planning Analytics as a Service (PA SaaS).
A Git repository can be used to store Planning Analytics database objects such as cubes, dimensions, rules and processes. These objects can then be moved between databases and environments, provided the databases are connected to the same Git repository. Git also provides version control during development, making it much easier to track and manage changes over time.
Accessing Remote Repositories #
In your Planning Analytics database, you can access repository operations by clicking the three dots next to the database and selecting Remote Repository Operations.
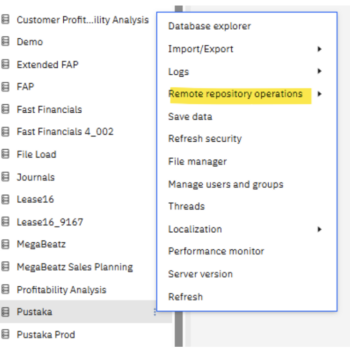
From here you can:
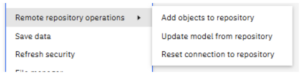
- Add objects to a repository
- Update the model from a repository
- Reset the connection to a repository
Planning Analytics currently supports the following Git providers:
In this article, we will focus on integrating with GitHub using the SSH authentication method.
When selecting Add Object to Repository, you will be presented with the repository authentication screen.
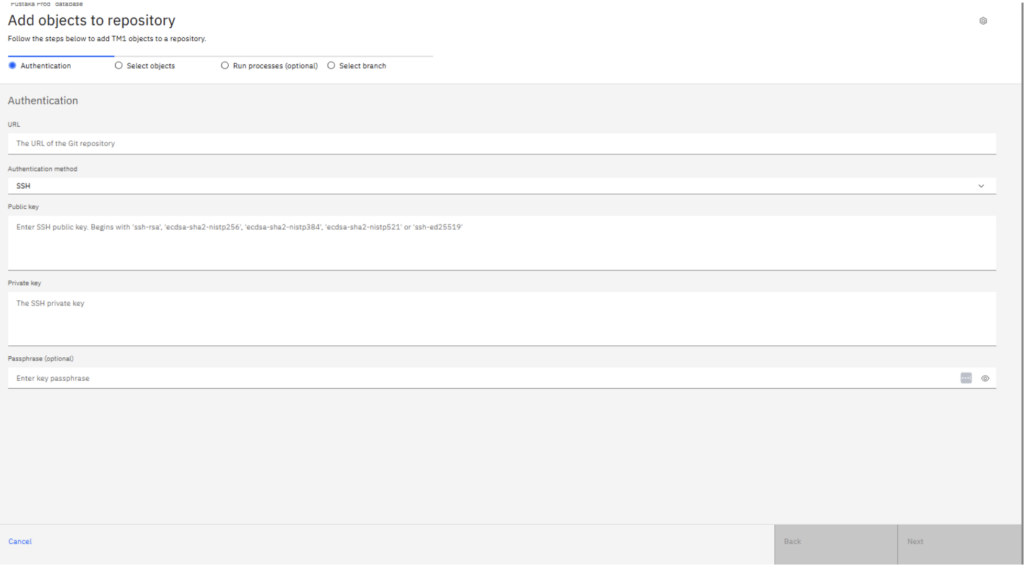
To connect your Planning Analytics database using SSH authentication, you will need:
- Git URL
- SSH Public Key
- SSH Private Key
A passphrase is optional and can be included if required.
Connect GitHub to Your Planning Analytics Database #
Follow the steps below to connect your GitHub repository to your Planning Analytics database using SSH authentication.
Step 1 – Create a GitHub Account and Repository #
If you do not already have a GitHub account, you can create one here: https://github.com/
Once your account has been created, create a new repository that will contain your Planning Analytics database objects.
GitHub provides instructions here:
https://docs.github.com/en/repositories/creating-and-managing-repositories/creating-a-new-repository
Step 2 – Obtain the Git Repository URL #
After creating your repository, click the <> Code button and select SSH.
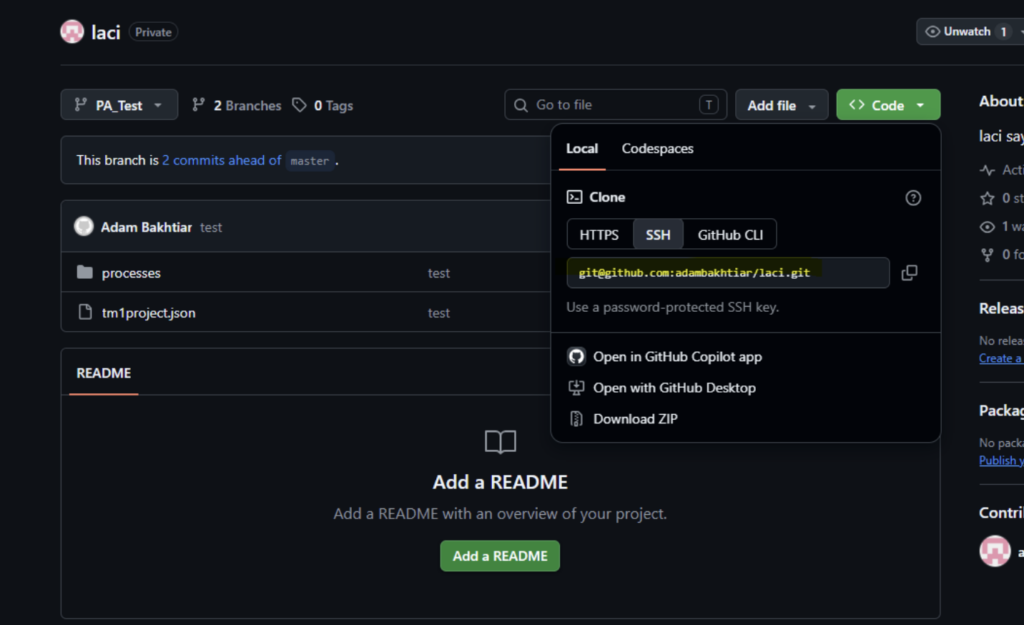
Copy the Git URL as this will be required later when configuring the repository connection within Planning Analytics.
Step 3 – Generate Your SSH Public and Private Keys #
To generate your SSH keys, install GitHub Desktop from: https://desktop.github.com/download/
GitHub Desktop includes Git Bash, which can be used to generate SSH keys.
Follow GitHub’s guide here:
In summary, run the following command in Git Bash, replacing the email address with the one associated with your GitHub account.
ssh-keygen -t ed25519 -C your_email@example.com
When prompted for the file location, press Enter to accept the default location, unless you already have existing SSH keys and wish to create a custom name.
You will then be prompted to create a passphrase. This is optional. If left blank, no passphrase will be required later when connecting Planning Analytics to GitHub.
Once the keys have been generated, locate them in Windows Explorer.

- The public key has a .pub extension.
- The private key has no file extension.
These files will be used later when configuring the repository connection.
Step 4 – Add Your SSH Public Key to GitHub #
Next, add the public SSH key to your GitHub account.
GitHub’s instructions are available here: https://docs.github.com/en/authentication/connecting-to-github-with-ssh/adding-a-new-ssh-key-to-your-github-account
In summary:
Copy the contents of your public key.
clip < ~/.ssh/id_ed25519.pubIf your SSH public key file has a different name than the example code, modify the filename to match your current setup. When copying your key, don’t add any newlines or whitespace.
Log into GitHub and navigate to:
Profile > Settings > SSH and GPG Keys
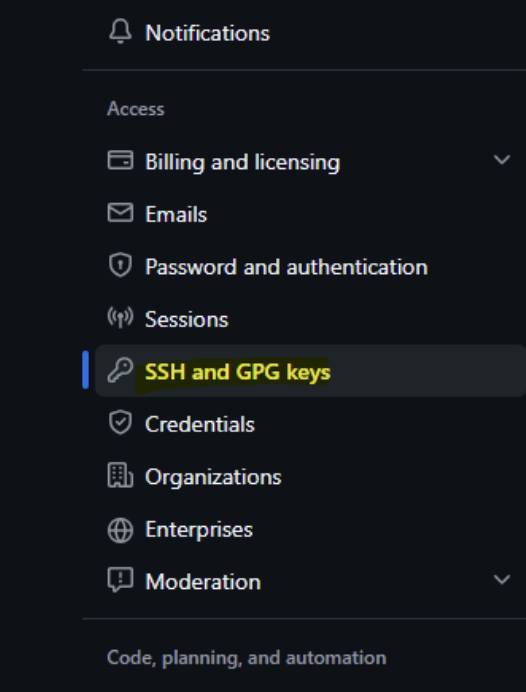
Select New SSH Key.
Enter:
- A title
- Authentication Key as the key type
- Paste the contents of your public key into the Key field
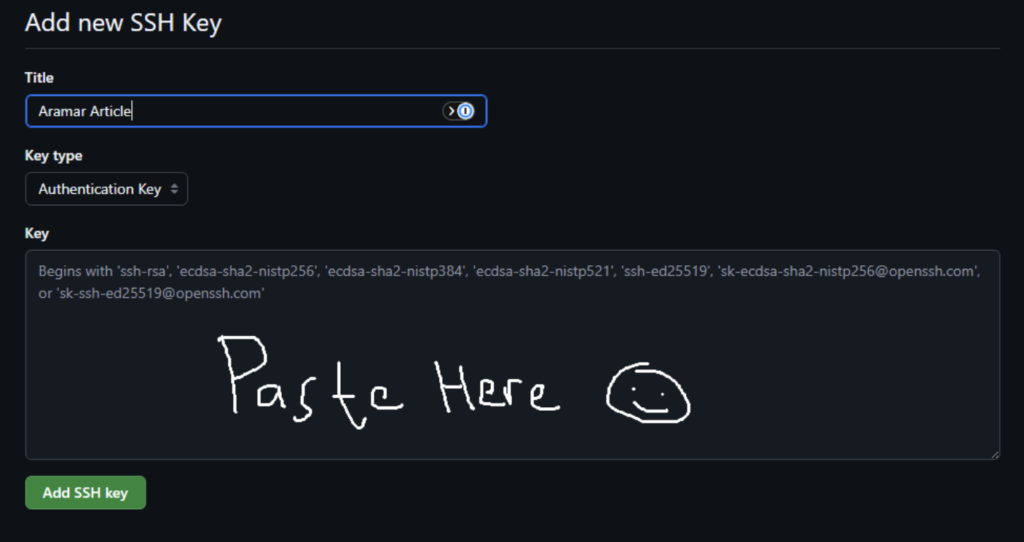
Click Add SSH Key.
Your GitHub account is now authorised to authenticate using your SSH key.
Step 5 – Connect Your Repository to Planning Analytics #
Open your Planning Analytics Workspace workbench.
Navigate to your database and select:
Three dots (or right-click) > Remote Repository Operations > Add Object to Repository
Complete the connection details:
- URL – Paste your Git repository URL.
- Authentication Method – SSH.
- Public Key – Open your id_ed25519.pub file and paste the contents.
- Private Key – Open your id_ed25519 file and paste the contents.
- Passphrase – Enter this only if you created one during key generation.
Select Next.
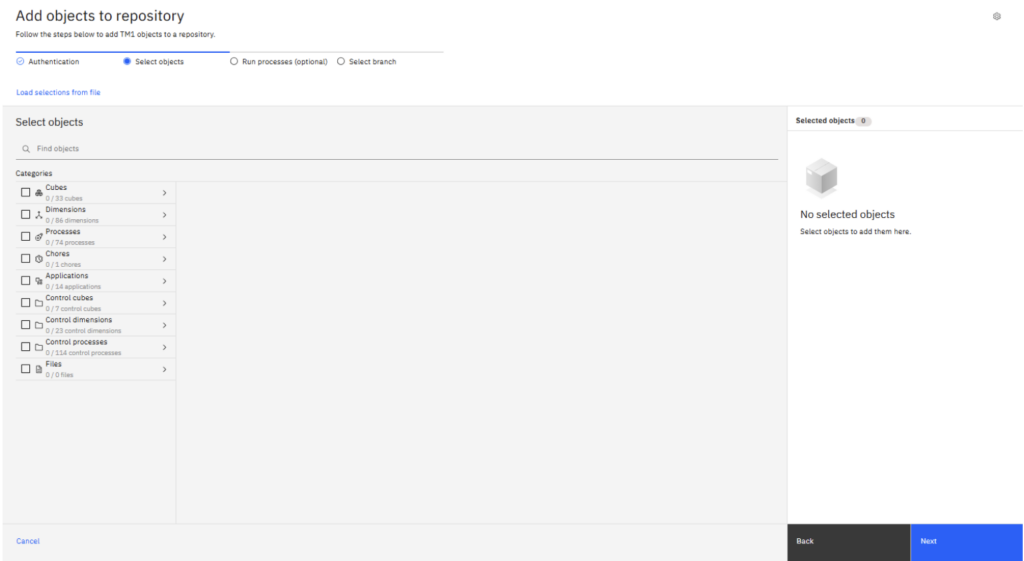
If the connection is successful, you can begin selecting database objects and pushing them into your GitHub repository.
Next Steps #
Once connected, your Git repository can be used to store Planning Analytics objects, manage version history and move objects between databases and environments more efficiently. This provides greater control over development and supports a more structured deployment process, particularly for Planning Analytics as a Service (PA SaaS) environments.Need Help?
If you have any questions about connecting Planning Analytics to GitHub or would like advice on implementing version control and deployment best practices, we’d be happy to help.
Get in touch with the Aramar team for expert guidance on Planning Analytics.


