Once a dimension has been created in IBM Planning Analytics, you may need to make changes to it over time. This could include updating the hierarchy, adding or deleting members, or changing member formats.
To edit a dimension, right click on the dimension name within the database in a workbench and select Edit Dimension.
This will open the dimension editor, where you can make structural changes to the dimension.
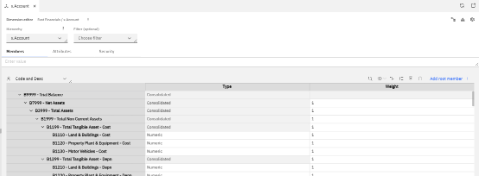
You will see the full list of dimension members within the editor.
Adding a new member #
To add a new member to the dimension, click Add root member +.
In the example below, a new member called B1140 has been created for the tangible asset Furniture – Costs. The member is added to the bottom of the list.
Attributes can then be populated and any required security applied.
Modifying the member hierarchy #
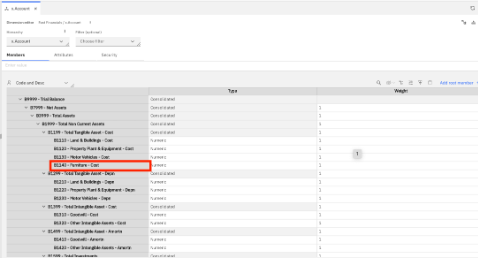
Members can be dragged and dropped to change their position within the hierarchy.
You can also:
- Cut or copy members
- Move them within roll-ups
- Paste them before, after, as a parent, or as a child of another member
In the example below, Furniture – Costs has been added into the Total Tangible Asset – Cost roll-up
Deleting a member #
To delete a member, highlight the item you want to remove. A blue ribbon will appear with a Delete drop-down option.
You can choose to:
- Remove the member from the parent
- Remove it from the hierarchy
- Remove it from the dimension completely
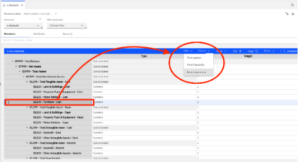
Removing a member from the dimension can result in irreversible data loss. IBM Planning Analytics will display a warning message before deletion.
Unless you are intentionally reducing the size of the dimension, it is often best to retain the member within the Leaves hierarchy to help protect the associated data.
Final thought #
Keeping dimensions well structured makes Planning Analytics models easier to maintain, easier to report from, and easier for users to understand.
If you’d like help improving the structure or usability of your Planning Analytics model, talk to us, we’re always happy to help.


