How to install Planning Analytics for Excel (PAfE)
IBM Planning Analytics for Excel (PafE) is an Excel add-in that enables you to interact with data and perform powerful planning, budgeting, and forecasting activities using IBM Planning Analytics with Watson, a fast and flexible multidimensional functional database. You can use IBM® Planning Analytics for Excel to access data from the TM1® Server on your IBM Planning Analytics system.
To use Planning Analytics for Excel with Planning Analytics, you first need to download, install, and configure the application.
Administrators can either download PAfE from Fix Central or from within their Planning Analytics environment. As the file is a .xll file, no typical installation is required.
You will need a copy of your Planning Analytics Welcome kit for the Excel URL, but it is of this format:
https://<<your environment name>>. planning-analytics.cloud.ibm.com
e.g., acme-inc.planning-analytics.com
Download via Planning Analytics:
- Log into Planning Analytics as an Administrator. On the Planning Analytics Workspace Home page, click the Administration title.
- On the Administration page, click Excel and Customisations.
- Select the version of Planning Analytics for Microsoft Excel you want to download. The three most recent versions are available for selection.
- Click Download Update.
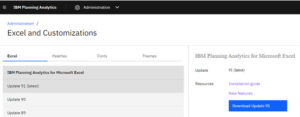
The installation is saved in your Downloads directory as a zip file, named Integration<version>.zip.
Extract the zip.
Once the zip file is extracted the resultant file will be named IBM PAfE_<version>.xll.
Rename the file by removing the version number at the end, this will make updating to newer versions easier in the future.
Uninstall existing version:
If there is an existing version of PAfE installed on the machine with a version extension you may want to remove this first, navigate to the location you saved the add-in to, typically:
C:\Users\<username>\AppData\Roaming\Microsoft\AddIns
Delete the existing version, you may find that upon opening excel, you may receive an error message displaying it cannot find the add-in.
Associate Excel with the PAfE Add-in:
Copy the file into your users ‘Addin’s’ folder, typically this would be like:
C:\Users\<username>\AppData\Roaming\Microsoft\AddIns
Next, open Excel and point to the location of the .xll file.
Select, File -> Options -> ‘Add-Ins’.
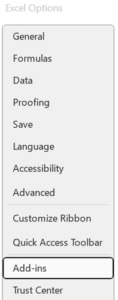
At the bottom of the ‘Add-Ins’ screen, confirm the ‘Manage’ drop down is showing ‘Excel Add-ins’, then click on the ‘Go’ button.

Click ‘Browse,’ navigate to the saved .xll file.
Select the .xll file and click OK.
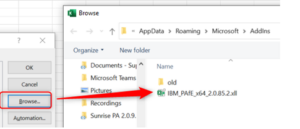
The .xll will now appear in the ‘Add-ins’ box as ‘IBM Planning Analytics for Excel Add-in’:
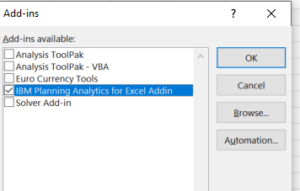
Click on OK to confirm the Add-in and close the dialogue box.
The IBM Planning Analytics tab will now be available within Excel on the ribbon bar when Excel is opened.
![]()
Set up a Connection to Planning Analytics:
Click on IBM Planning Analytics in the ribbon bar.
Click on Connect and from the resultant drop down, select ‘New Connection’:
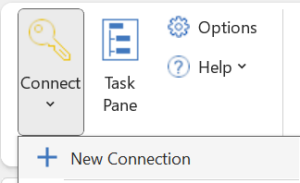
A blank default Connection box will appear which will need to be populated with the Connection URL, this can be found under the heading, Planning Analytics for Microsoft Excel supplied in your Planning Analytics Welcome Kit.
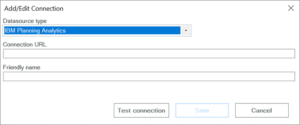
Add in the Connection URL and a Friendly name and click on ‘Save’ when completed.
The new entry will now be available under the ‘Connect’ drop down on the ‘IBM Planning Analytics’ tab.
To make a connection, click on the Friendly Name entered above.
You will be asked to log in using your IBMid, once completed and depending on your environment, you will be presented with a choice of databases to connect with.

Select the database you wish to connect to, click on OK, and you will now be connected to your Planning Analytics environment.
Blank Task Pane window:
Some users may see a blank Task Pane window (as below), this may be due to an Incompatibility with Excel and the screen(s) being used.
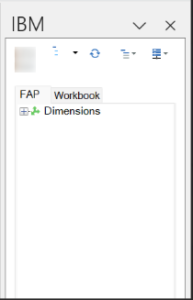
To resolve this, open Excel.
Under ‘File’ – > ‘Options’, in the ‘General’ tab select the ‘Optimize for compatibility’ radio button.
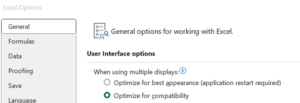
Close and restart Excel and the Task Pane Window will now show as populated.
Let us know your thoughts here.
Shafique Rahman, Technical Support and Lindy Robins, Product Specialist – 22nd January 2024